Vegan

valentine’s day : homemade dark chocolate

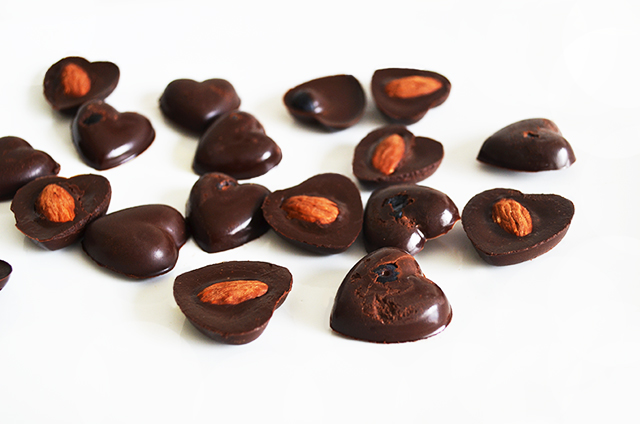
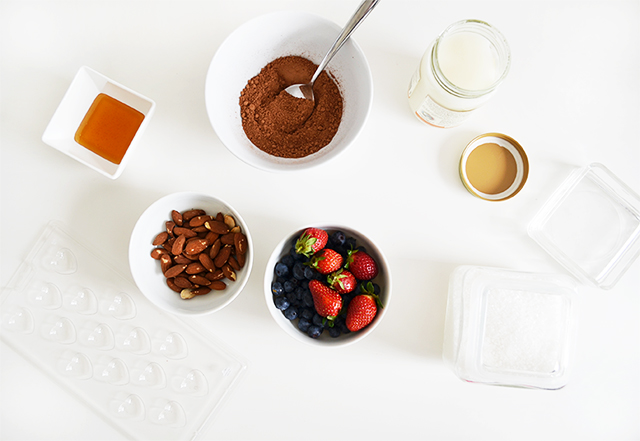
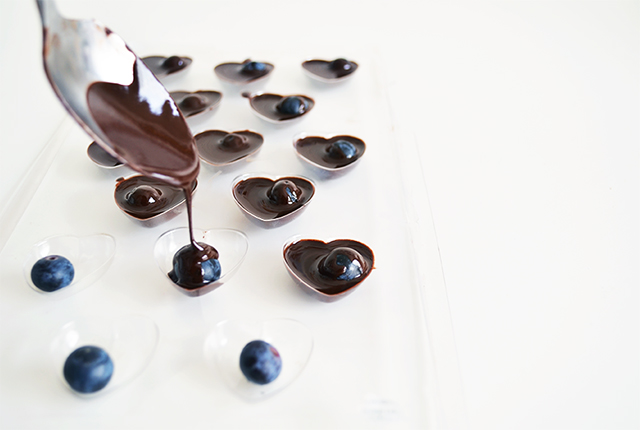
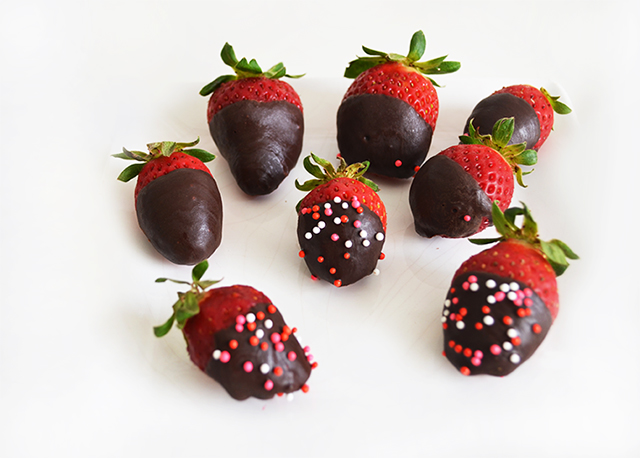
Have you ever tried to make homemade chocolate? Me? I’ve tried some recipes with chocolate, but had no idea I can make chocolate itself until I came across her amazing blog and found this recipe. It’s super easy and taste just amazing. My husband is a chocoholic and he loves it too. The best thing is that we can adjust the sweetness and there is no white sugar in it. How perfect is that? I used heart-shaped mold   for Valentine’s day, but you can make any shapes you want. Even if you’re not a chocoholic, this is a recipe is definitely worth a try! *My hubby’s favorite was a blueberry one. Ingredients : 1 cup unsweetened cocoa powder, 1/2 cup melted coconut oil, 1/3 cup honey, a few dashes of sea salt,  * plus any add ins you like

今までチョコを使ったお菓子は色々作ってきたけど、チョコレート自体を作れるとは知らなかった..! 材料を入れて混ぜるだけでとっても簡単で美味しいダークチョコレートができました。蜂蜜だけでお砂糖は入ってないし、甘さを調節できる所も素敵。今回♥型を使ったけどどんな形にもできるし簡単なので是非試してみて下さい。使ったこのレシピの様に簡単板チョコでも◎。日本はバレンタインと言えばチョコなイメージだしぎりぎりになっちゃったけどギフトにも♥ 材料 : ココアパウダー 1カップ、溶かしたココナッツオイル 1/2カップ、蜂蜜 1/3カップ、 塩少々、お好みの中身(今回はアーモンドとブルーベリー、苺を使いました)

1. Mix all the ingredients together in a bowl
1. 材料全てをボールに入れて混ぜる
2. Pour the chocolate batter onto a mold. or dip the strawberry into the dark chocolate
2. お好みで好きな中身を入れた型にチョコを流し入れる、又はイチゴをにつけても◎

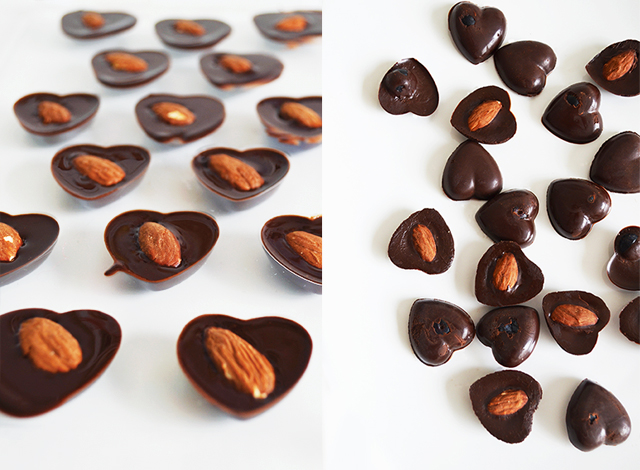
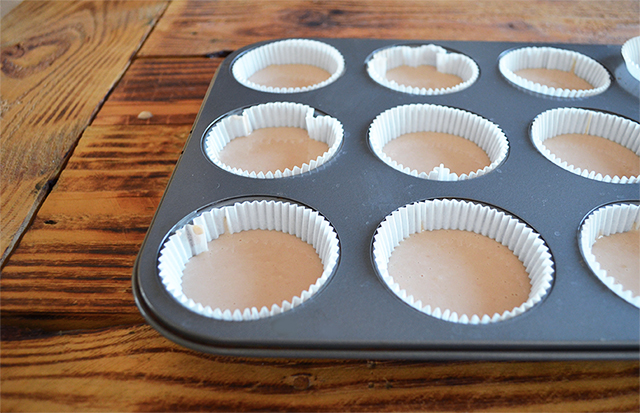
3. Place the mold with chocolate into the freezer and freeze for about 30 minutes or until it is set 3. 型を冷凍庫に入れ(冷蔵庫でもすぐ固まりました)30分、か固まるまで冷やす

 人気ブログランキングへにほんブログ村 ファッションブログ トレンド情報(ファッション)へ

Thank you so much for your support :)

mason jar vegan parfait

I’m a huge fan of whipped cream (ex-addict), but since I’m trying to reduce dairy, I was so excited when I found this recipe of coconut milk whipped cream. It tastes more than amazing and I ate almost half of cream just by itself..! So basically I wanted to make something using cream and it was perfect for parfait in a jar. Valentine day is around the corner, it’d make a great gift for your loved one too. I made vegan sponge cake here (*I used soy milk yogurt), but you can use store bought cake and whipped cream if you don’t have time to make it. It looks pretty in a jar anyway. :) p.s. I’m loving the spoons my friend sent it to me as a gift. So beautiful!

スイーツの中でもホイップクリームが大好き。前はよく缶のクリームを買ってたけど最近は減らしてた所、ココナッツミルクバージョンを発見。このレシピを試してみたらすっごく美味しい! 何もつけず半分はスプーンで食べてしまった.. 簡単だしこれは紹介したいので又次回載せたいと思います。でそのクリームを使ってカップケーキでも作ろうかと思ったけど、見た目も可愛いパフェを作ってみました。スポンジケーキはこれを作りました(豆乳ヨーグルトを使用)。もうすぐバレンタインデーだしギフトにも◎。時間がなかったらお店で売ってるスポンジやクリームを使ってもジャーに入れるだけで可愛くなると思います☆ 大学時代のお友達が送ってくれたすっごく素敵なデザートシルバーを早速使ってみました。他にも沢山のギフトありがとう♥


 人気ブログランキングへにほんブログ村 ファッションブログ トレンド情報(ファッション)へ

Thank you so much for your support :)

vegan vanilla cupcakes

Today is our one-year anniversary! One year ago today Omar and I went to a city hall to get married (had a wedding a couple month later). I was going to surprise him with this cupcakes, but instead he came home while I was still decorating, haha. Also I tasted them first in front of him, these are still for my best husband. I’ve baked some cupcakes before, but this is one of the best and most importantly Omar likes them. The soy whip cream I tried for the first time was delicious too!

Ingredients : 11/4 cups All purpose flour, 1/2 cup Sugar, 1/2 teaspoon Baking powder, 1/2 teaspoon Baking soda, 1/2 teaspoon Salt, 1 tablespoon Almond poodle, 1 cup Soy milk (or Almond milk), 1 teaspoon Apple Cider Vinegar, 1/3 cup Oil, 2 teaspoons Vanilla Exact

今日は私達の1周年記念日。式を挙げたのは2月だけどちょうど1年前の今日シティーホールで結婚しました。いつも優しいオマーにケーキでサプライズしようと(作ってる最中に帰ってきちゃった上に私が先に味見して全然サプライズにならなかったけど…)喜んでくれてよかった。カップケーキは何度か作ってるけどこれは既に私が半分以上食べてる位すごくお気に入り。ビーガンなので卵もバターも使ってなくアレルギーがある方にもお勧めです。トッピングのクリームは始めてソイホイップを使ってみたけど美味しかった☆

材料:小麦粉 11/4カップ、砂糖 1/2カップ、ベーキングパウダー 小さじ半、ベーキングソーダ小さじ半、塩 小さじ半、アーモンドプードル 大さじ1、豆乳(アーモンドミルク可)1カップ、アップルサイダービネガー 小さじ1、オイル 1/3カップ、バニラエッセンス 小さじ2

1. Preheat the oven at 350F. In a bowl, mix together the milk and vinegar allowing it curdle. In another bowl sift together the flour, baking powder, baking soda and salt. Stir in the sugar too. 1. オーブンを180Cに温める。豆乳にビネガーを加えとろりとするまで混ぜる。別のボールに小麦粉、ベーキングパウダー、ベーキングソーダ、塩、アーモンドプードル、砂糖を加え混ぜる。

2. Once the milk has curdled, stir in the oil and vanilla exact. Whisk it well to combine. Slowly add the wet ingredients to the dry ingredients, stirring it until all the ingredients come together. * do not over mix it otherwise you won’t get fluffy cupcakes.
2. 豆乳がとろりとしたらオイルとバニラエッセンスを加え混ぜる。混ぜ合わさったら小麦粉のボールにゆっくりと加える混ぜる(フワっとしなくなるのであまり混ぜ合わせすぎない様に)

3. Fill each muffin tin. Bake it for about 15-20 minutes or until a toothpiik inserted in the middle of the cupcake comes out clean.
3. カップケーキ型に流し入れ、15~20分焼く。楊枝を刺して中身が付いて来なくなったら出来上がり。

4. Let it cool completely before you can decorate it. * I used this soy whip cream and raspberries.
4. 完全に冷えてからトッピングをする。*私はこのソイホイップとラスベリーで飾り付けしました

  人気ブログランキングへにほんブログ村 ファッションブログ トレンド情報(ファッション)へ

Thank you so much for your support :)

kabocha squash & yogurt cake – no butter, no egg

Halloween is around the corner and I start seeing pumpkin products everywhere. Kabocha squash is very popular vegetable in Japan (Kabocha is a japanese pumpkin) and one of my favorites especially during the cold season. So I decided to make simple moist cake from scratch. Because these are very healthy, you can decorate with anything, like whipped cream frosting without guilt for Halloween! Mine is vegan and dairy-free as I used soy yogurt.

Ingredients : 1 cup kabocha squash, 1 cup strained yogurt, 3 tablespoon sugar, 3 tablespoon unbleached flour   * How to make strained yogurt here

気づけばもうすぐハロウィーン。大好きなカボチャの季節になってきたので、ヨーグルトを使ってケーキを作ってみました。今回はデコレーションしなかったけどとてもヘルシーなので上に生クリーム等でハロウィーン使用にしても◎と思います。ケーキと言ってもとってもしっとりで冷やして食べても美味しくできました。

材料 : カボチャ 1カップ、水切りヨーグルト 1カップ、砂糖 大さじ3、小麦粉 大さじ3
* 水切りヨーグルト作り方はここに色々載ってました
1. Cut the squash in half and scoop out all the seeds. Peel the outer skin and cut the squash into small pieces. Steam or microwave them until tender. Process the food processor until the pumpkins are pureed.
1. カボチャの種とワタを取った後、皮を切り茹でるかレンジ等で柔らかくしてフードプロセッサーに入れペースト状にする
2. Transfer processed kabocha into a large bowl and add Strained yogurt, flour and sugar. Mix well
2. ボールに移し、他の材料(水切りヨーグルト、小麦粉とお砂糖)を加え混ぜる

3. Using a spoon, fill each cupcake liners. Bake at 330F for about 45 minutes, until a toothpick comes out clean.
3. カップに入れて170度のオーブンで45分程焼く。楊枝等刺して何もついてこなければ完成

Thank you so much for your support :)

baked vegetable chips

The kale chips I posted before, became the most frequent recipe for us ever since. Omar loves it, especially with his favorite sandwiches. So I decided to make vegetable chips as well. The first time I baked them at 350F, they burned them quickly (and thick ones weren’t crispy at all). After researching a bit, I tried 200-230F and baked for more than an hour. They came out good, but some were not crispy enough. They’re harder than Kale chips, which never fails, but hopefully I’ll get it better next time.

以前載せたケールチップがお気に入りでここに載せた中では一番よく作ってるかも(簡単だし)。オマーも好きでたまにスーパーでケールを見かけては買ってくるので今度は他の野菜も使ってチップスを作ってみました。最初175度位で焼いたら薄いの(特にじゃがいも)はすぐに焦げてしまい、ビート等は生焼け状態だったので、2回目は95度位で1時間以上焼いてみました。薄いのはいい感じにパリパリになって美味しかったけどちょっと厚めに切ったのは中々パリっとならず。。薄く切って低い温度で時間をかけて焼くのがコツの様。後オーブンによっても焼け具合が違うので様子をみつつ試すのがいいかもです。

Thank you so much for your support :)