
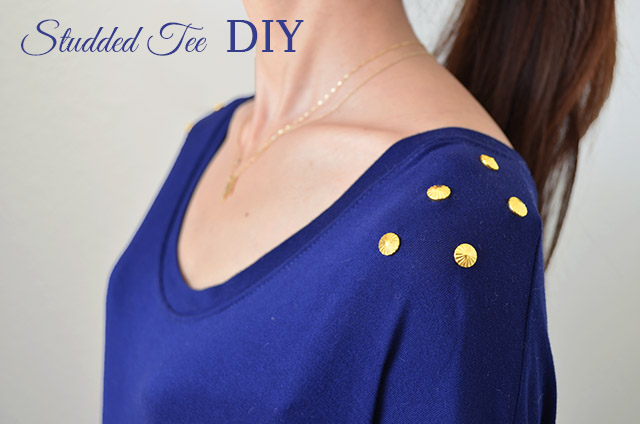
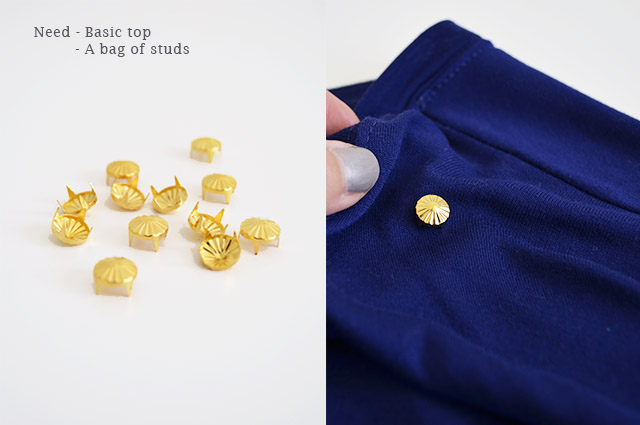
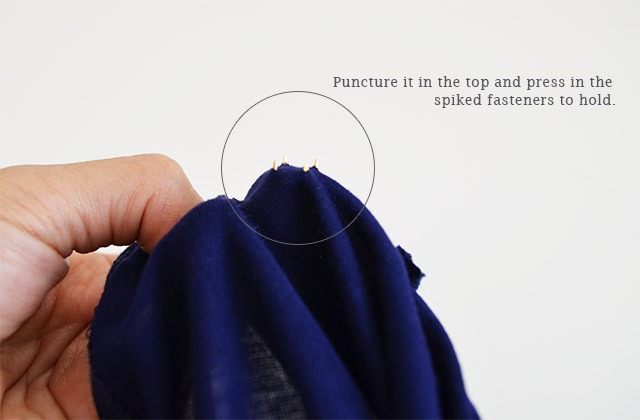
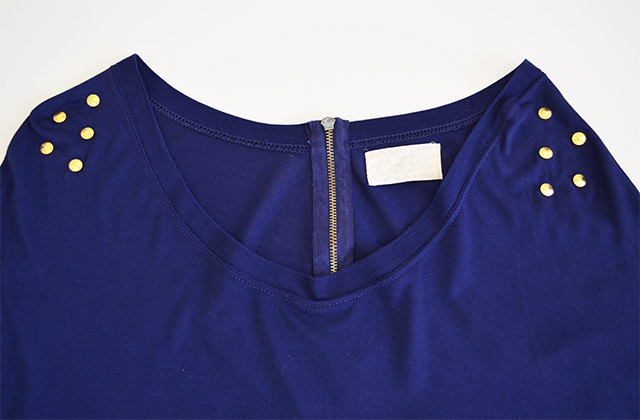
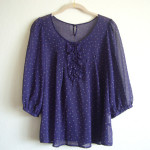
I found a tiny hole on the shoulder of my top from Zara. It reminded me of a bag of studs I bought a while ago. I’ve been trying to do this DIY and this is a perfect time to finally make it happen. I thought I had to glue the studs on the fabric, but found out it’s so much easier – no glue, no mess! Now I love the detail on my top and here’s how I did it.
春服を出してたらZaraのトップの肩に小さな穴を発見。。かなり前に買ってそのままだったスタッズを思い出しやっと使ってみました。スタッズは接着剤みたいので付けるのかと思ってたけど布に刺して閉じるだけで想像してたより全然簡単。小さな穴も隠せたしよかった☆

Thank you so much for your support :)


lovely shirt I wanna have !
Oh, super cool post, very interesting:)Your blog is a great place:)
Would you like to follow each other? Just let me know, if you enjoy my blog of course:)
svetlanabeauty.blogspot.com
hoho
Svetlana
Let me know when you follow me back babe, I follow you with GFC+ and bloglovin.
Here is my bloglovin: http://www.bloglovin.com/supongoestilo
and here my GFC+ https://plus.google.com/u/0/110952416586330663008/posts
This is one of the most simple and most genius DIYs ever made, I love it Akiko!
these studs are so cute!
So creative and looks beautiful on you! I didn’t know it would be so easy to DIY the studs! Great post :)
Cool idea to pimp up a simple shirt :-) … Kisses from Vienna,
Katja
http://www.collectedbykatja.com
Wow, great diy!!
The Fashion Heels
Facebook
Bloglovin
Twitter
Thanks for visit my blog Akiko!! love yours!!! I’m your new follower on GFC :)!!!!! xxx
http://alicantestreetstyle.com
Definitely a cool idea! How does it feel on the inside tho? I don’t own any clothes that has studs on it which is why I’m always curious how it felt when worn.. Anyway thanks for stopping by my blog! :)
Kaye
http://itsmekikay.com
Thanks all! @ k@ye, the inside is okay, I mean it doesn’t bother me at all! So It’s comfortable to wear :)
Very nice!
SNB: Sexy, Naughty, Bitchy me
☼ BITCHY GYPSY WORLDWIDE GIVEAWAY ☼
Looks great! Your photos are lovely – so clean :)
Blog | Cocochic △
Bloglovin | http://www.bloglovin.com/blog/1823055/
great final product, i love the gold studs against the dark blue. also, thank you for commenting on my recent blog post and would you like to follow each other? i am following your blog now on GFC and Bloglovin’ and would love it if you could maybe follow mines back. thank you!
xoxo
http://1finedai.blogspot.com/
this looks so cool!
xx fameliquorlove.blogspot.com
Great DIY! I love the shirt and the studs.
-Vogue&Heels
http://www.vogueandheels.com
Here is you can follow me babe https://plus.google.com/u/0/110952416586330663008 xjes
Here is you can follow me babe https://plus.google.com/u/0/110952416586330663008 xjes
Here is you can follow me babe https://plus.google.com/u/0/110952416586330663008 xjes
Hey love!
Great tutorial. Love the top
Thanks for visiting my blog! I really appreciate it.
I already followed you through GFC, so if you can please follow me back, that would be great. If you already followed me, then thank you.:)
Keep in touch!
Lovely post!
Please follow and visit me :D
Danica Stark
Oh really cute and easy DIY is so easy. MAny thanks for share. Sure I´ll do this!
Sweetie now I´m following you in Bloglovin´and GFC
I hope your follow me back
xoxo
http://www.sakuranko.com
Great work! I did something similar on a tee some years ago, but the studs didn’t stay on, so I renounced.
whoa, cool! :D I love the color combination. by the way, where do you get that kind of studs? i can’t find studs with that pattern in my country :(
my blog : Marshmallow Pops