Savory

ricotta cheese & spinach pie

ricotta4
Do you like pie? I love both dessert and savory pies – so yum I can’t resist it. I baked these when I went to my friend’s house to have lunch together a few weeks ago. She always cooks for me, so I wanted to bring something tasty and easy to carry too. Ricotta cheese is something I normally don’t have in my fridge, but I had a leftover as I made ricotta cheese pancake a few nights before (which slightly failed). These pies turned out so good and I’d love to make them again soon. * This is a pie crust recipe I used.

少し時間経ってしまったけど友達の家でランチをごちそうになった時に持って行ったパイを載せたいと思います。普段買わないリコッタチーズだけどこれを作る数日前にどうしてもリコッタチーズパンケーキを作ってみたくなって買ってあって他の使い道がなかったのでちょうど使い切れて良かった (パンケーキはあまり美味しくできず..このパイの方が全然美味しくできました)。久しぶりに甘くないパイを作ったけどハマりそう。良かったら是非 *パイ生地はこのレシピ(英語)を使いました。パイシートを使っても◎です

ricotta_pie
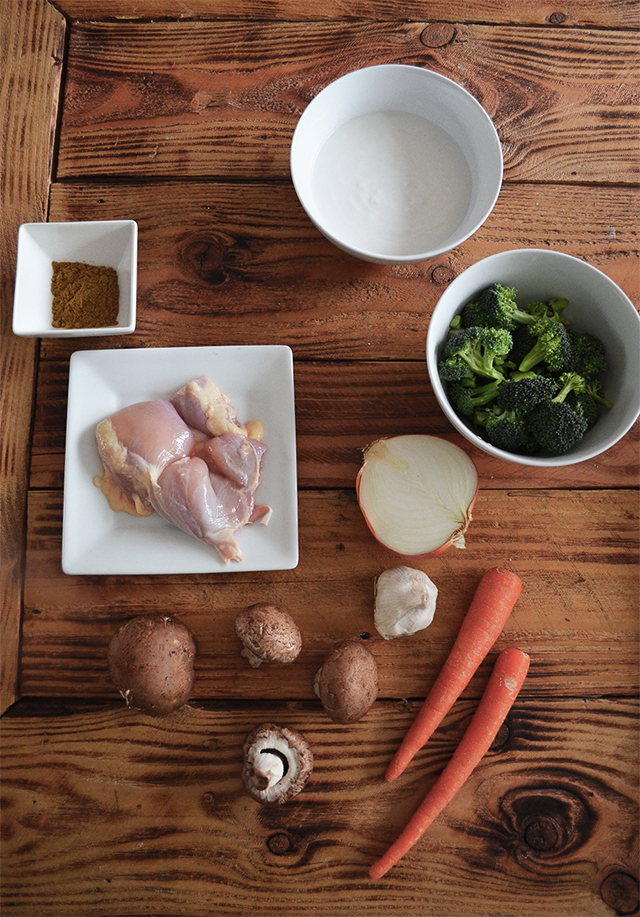
Ingredients : 1/2 cup ricotta cheese, 5oz (1bag) spinach, 2 slices ham, pinch of salt and pepper, 1/2 egg mixed with 1 teaspoon water for egg wash, pie crust

材料:1/2カップ リコッタチーズ、142g ほうれん草、薄切りハム数枚、塩こしょう少々
ドリュール:1/2 卵+水小さじ1*お好みのパイシート
ricotta2
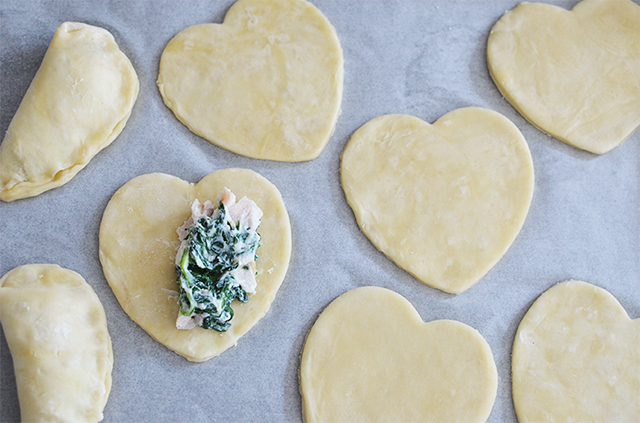
1. Place spinach in a pot of boiling water, cook about 3 min, then drain. Cut spinach and ham into small pieces. In a medium bowl, combine spinach, ham and ricotta cheese. Add salt and pepper to taste.
2. Rolled piecrust and cut your dough into circles (I used Heart shaped one as that’s the only perfect size cutter I had)

1. 法蓮草はさっと茹でて水を切り食べやすい大きさに切る。2cm程に切ったハムとリコッタチーズを加え軽くあえ、塩こしょうする。
2. パイ生地を綿棒で5mm位の厚さに延ばして丸い型で抜く(ちょうど良さそうな大きさのが♥型しかなかったけどいい感じにまとまりました)

ricotta3
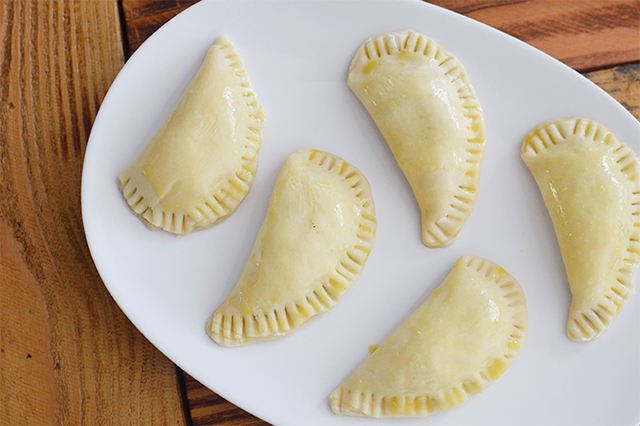
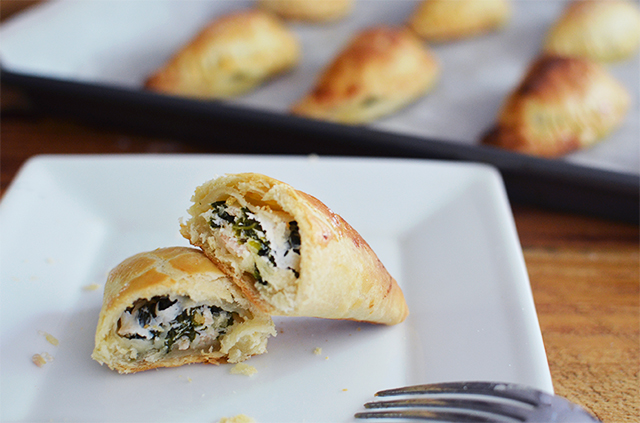
3. Using a teaspoon, add the mixture to the pie dough, fold the dough over into a half moon shape. *Dip your finger into water and fun it along the edge of the pie. Brush the tops with egg wash.

3.パイ生地に中身をのせ、半分に織り生地の端に水をつけしっかり留める。表面にドリュールを塗る。
ricotta5
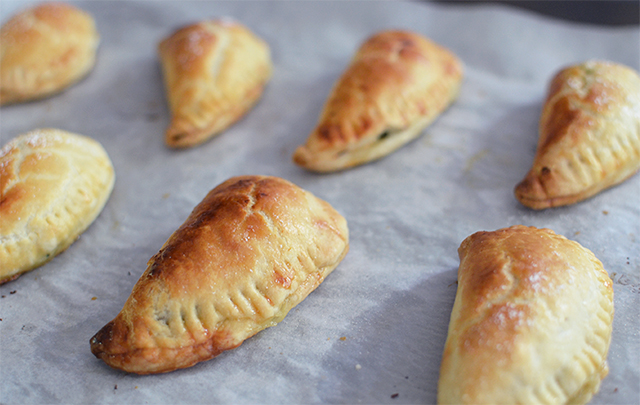
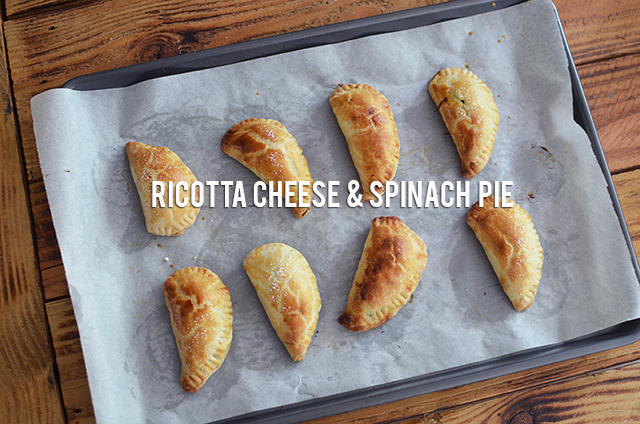
4. Bake in the preheated oven (390F) for about 20 minutes

4. 200度に予熱したオーブンで焼き色がつくまで(約20程)焼く

 人気ブログランキングへにほんブログ村 ファッションブログ トレンド情報(ファッション)へ

Thank you so much for your support :)

homemade dressing

I wanted to eat nothing but salad last week because of the heat waves we had (around 100f, 40c!). Oh wait, it’s more like I just didn’t want to use gas stove at all. So I made salad more often than usual, and here are my two favorite homemade dressings so far. One is basic italian, and the other is sesame dressing which you might tried in a Japanese restaurant. Making homemade salad dressing was a bit intimidating at first, but once I tried, it’s easy and the best thing is that we can add or reduce what ever ingredients we want. Ingredients below.
Italian Dressing : 11/2 tablespoons olive oil, 1 tablespoon apple cider vinegar, 1 tablespoon balsamic vinegar, 2 tablespoons water, 1 tablespoon honey, 1 tablespoon onion grated with grater, pinch of salt, pepper and garlic powder
Sesami Dressing : 2 teaspoons soy source, 2 teaspoons vinegar, 2 tablespoons grind sesame seeds, 2 tablespoons Mayonnaise, 2 teaspoons maple syrup
先週は40度超えの溶けるかと思う暑さが続いて、クーラーを付けててもキッチンの火は使いたくない状況。。で普段そんなに食べないサラダばかり食べてた様な日々でした。前は自分でドレッシングを作るのは難しそうとお店で買ってたけど(今でも買うけど)作ってみたら簡単で最近よく作ってたので載せてみます。イタリアンドレッシングは最近玉ねぎのすったのを入れると又違った美味しさになる事を発見。後前から作りたかった大好きなゴマドレッシングも思ったより簡単に美味しくできました。微妙な味は塩や甘味を調節したり後玉ねぎは好みがあるかもなので好きじゃなかったらなしで作っても全然◎です。
イタリアンドレッシング:オリーブオイル大さじ1強、お酢大さじ2 (今回半分だけバルサミコ酢を入れました)、 水大さじ2、 蜂蜜大さじ1、すりおろし玉ねぎ大さじ1、塩胡椒少々、ガーリックパウダー少々
セサミドレッシング:お醤油小さじ2、お酢小さじ2、すりごま大さじ2、マヨネーズ大さじ2、メープルシロップ小さじ2
just pour all the ingredients into the bowl and mix. Please adjust the amounts as you like
それぞれ材料を全て入れ混ぜるだけ。お好みに合わせて分量を調節して下さい
This is how we grind sesame seeds in Japan. There is a special bowl for it, but because I don’t have it, I just used regular dish (it’s harder!). I found this video on youtube. or this
すり鉢がない為、お皿でやったら中々すれず..
 人気ブログランキングへにほんブログ村 ファッションブログ トレンド情報(ファッション)へ

Thank you so much for your support :)

coconut chicken curry

I’ve been kind of addicted to coconut milk ever since I found out coconut whipped cream I posted here. However, some cans of coconut milk doesn’t work for whipped cream (has to be full-fat), and there were sad leftover sitting in a fridge. So I was going to bake sweets as always, but tried thai curry instead. I’m glad I did. It’s a lot easier than I thought and taste amazing. Always good to have more recipe for dinner, and when we’re making it at home, we get to control the flavor too! * Recipe below. Ingredients : 1 can (13.5oz) coconut milk, 2 tablespoons curry powder,  1 tablespoon maple syrup, 2 cloves garlic, salt as desired, about 1lbs. chicken thighs, any vegetables you like: I used.. yellow onion, broccoli, mushroom, carrots

ここに載せたココナッツホイップクリームを知って以来今まで買った事なかったココナッツミルクを頻繁に買ってる私。けどホイップを作るには100%ココナッツでないとできず(水等が混ざってる缶ではX)いくつか使えなかった残りが冷蔵庫を占領してたので始めてタイカレーを作ってみました。思ったより簡単で、日本のカレーとは又違ったココナッツ風味が新鮮! 私は辛いのは苦手だけど、これなら問題なく又もっと辛くしたければパウダーの量を増やしたりして調節できる所も◎。ある野菜を適当にいれちゃったけど美味しくきました☆ 下にレシピ載せました 材料 : ココナッツミルク1缶、カレーパウダー大さじ2、メープルシロップ大さじ1、にんにく2粒、お好みでお塩、鶏のもも肉、玉ねぎ、人参、ブロッコリー、マッシュルーム等 *量は下記写真分入れました

1. Chop up garlic, cut your chicken in to cubes, slice up onions, cut other vegetables.
1. ニンニクをみじん切り、玉ねぎはスライスし、他野菜、鶏肉をそれぞれ切る
2. Heat a skillet over medium heat, saute the garlic and onions with the olive oil. then trow in the cubed chickens. Once the meat is cooked very lightly, throw the rest of vegetables.
2.中火でニンニクと玉ねぎを炒め、玉ねぎがしんなりしたら鶏肉を加えその後他野菜を加える
3. Add the coconut milk/ curry powder/ maple syrup (taste and adjust flavors as needed)
3. ココナッツミルク、カレーパウダー、メープルシロップ、お好みで塩を加える
4. Mix it all together well, and turn the heat to high. Once it starts simmering, lower the heat to medium low and cover. Let it cook until fork-tender.
4. 全て混ぜ中火で暫く煮込む
*レシピによっては水を加えてるので、サラサラなスープが好きな方は少し水を足すと良いかも。私は足さないでちょうどいい感じでした

 人気ブログランキングへにほんブログ村 ファッションブログ トレンド情報(ファッション)へ

Thank you so much for your support :)

baked vegetable chips

The kale chips I posted before, became the most frequent recipe for us ever since. Omar loves it, especially with his favorite sandwiches. So I decided to make vegetable chips as well. The first time I baked them at 350F, they burned them quickly (and thick ones weren’t crispy at all). After researching a bit, I tried 200-230F and baked for more than an hour. They came out good, but some were not crispy enough. They’re harder than Kale chips, which never fails, but hopefully I’ll get it better next time.

以前載せたケールチップがお気に入りでここに載せた中では一番よく作ってるかも(簡単だし)。オマーも好きでたまにスーパーでケールを見かけては買ってくるので今度は他の野菜も使ってチップスを作ってみました。最初175度位で焼いたら薄いの(特にじゃがいも)はすぐに焦げてしまい、ビート等は生焼け状態だったので、2回目は95度位で1時間以上焼いてみました。薄いのはいい感じにパリパリになって美味しかったけどちょっと厚めに切ったのは中々パリっとならず。。薄く切って低い温度で時間をかけて焼くのがコツの様。後オーブンによっても焼け具合が違うので様子をみつつ試すのがいいかもです。

Thank you so much for your support :)

baked kale chips

Although I knew Kale is one of the healthiest vegetables around, I’d never really used/eaten them before as I just didn’t like the way they tasted. However, this Kale chips made me change my opinion completely. It tastes so good! I didn’t know what to do when I accidentally(?) bought a bunch of Kale, but am so glad I tried this recipe. Kale chips became one of my favorite snacks!
Ingredients : 1 bunch Kale, 1 tablespoon Olive Oil, 1 teaspoon salt

ケールは色んな栄養があってとっても体に良い事は知ってたけど、あの独特な味が苦手で自分で買う事はまずなかった野菜の1つ。こないだ始めて1束買ってみたものの食べきらないだろうなぁと思い出した前見たケールチップを作ってみました。これが香ばしくて美味しい!簡単だしお菓子代わりに食べてもいい位でお勧めです☆
材料:ケール1束、大さじ1 オリーブオイル、小さじ1 お塩
1. Preheat an oven to 350 degrees. Carefully remove the leaves from the stems and tear into large pieces. Wash and throughly dry kale. Drizzle kale with olive oil and sprinkle with salt.
1. オーブンを175度に予熱。ケールの芯は固いので芯は取り除き葉っぱの部分を食べやすい大きさに切る。水気を取りボールにいれ、オリーブオイルと塩を入れ混ぜる。
2. Arrange leaves in a single layer on a large baking sheet. Bake for 10-15 minutes or until crisp.
2. クッキングシートの上に重ならない様に並べ、10−15分程焼く。パリっとしたら出来上がり

 人気ブログランキングへにほんブログ村 ファッションブログ トレンド情報(ファッション)へ

Thank you so much for your support :)